A floor can contain one or more areas and subfloors. When areas and subfloors are added, they get added beneath the parent floor of the facility. Since floor usage may change over time, it may be necessary to add, edit, or delete floors or sub-floors and add or update floor plan images. See Add an Area for adding areas to a floor. For adding floors, refer to the article Add a Floor.
Subfloor – If you have several floor plans to display (i.e., different levels on the same floor such as a mezzanine area in manufacturing or a furniture floor plan for desk sensors), add a subfloor to commission sensors on an alternative floor plan. The subfloors inherit gateways, and specific floor parameters such as the Site ID, floor elevation from their parent floor. Note that you cannot commission gateways on subfloors nor add areas. However, you can commission all other Enlighted devices such as sensors, switches, etc., on subfloors.
When you have numerous gateways on a floor, you can decide to show or hide gateways to which devices will be commissioned on the subfloor. See Changing Visibility of Gateways.
Floor Plan Graphics Image
Each subfloor may have a floor plan image associated with it. The graphic image file type may be a JPG, GIF, or PNG. When generating the floor plan image, decide on the resolution and file type. Make sure the floor plan graphic image file is accessible on the system where the browser is running.
Adding a Subfloor
The system or facility admin may add new subfloors.
- Select a Floor in the facilities' navigation panel.
- Select the Campus > Building > Floor.
- Click the Settings tab.
- Scroll down to the lower portion of the screen to the Details 'SubFloors' section. It contains an edit area and the list of any existing subfloors in the building.
To add a new subfloor, follow these steps. The subfloor will inherit the Site ID and Floor Elevation from its parent floor.
- Type the Name of the new subfloor and Describe the subfloor.
- Select a floor size from the drop-down list. There are two options: Less than 10K square feet or Greater than 10K square feet.
- Upload the floor plan image. Click the Choose File button and select the graphic image file from your system.
- Type the Ceiling Height in feet. This is the ceiling height, above the finished floor, of each floor in the building. For a desk sensor deployment, this would be the height of the underside of the desks.
Note: The Ceiling Height and Floor Elevation are optional fields for determining the accurate location of objects or people on a floor used by the Enlighted Where application. You can skip these fields if Where is not part of your solution. Otherwise, refer to the article Location Accuracy for details. - Click the Create another Sub Floor button to add a new subfloor. The new floor is added to the list of subfloors.

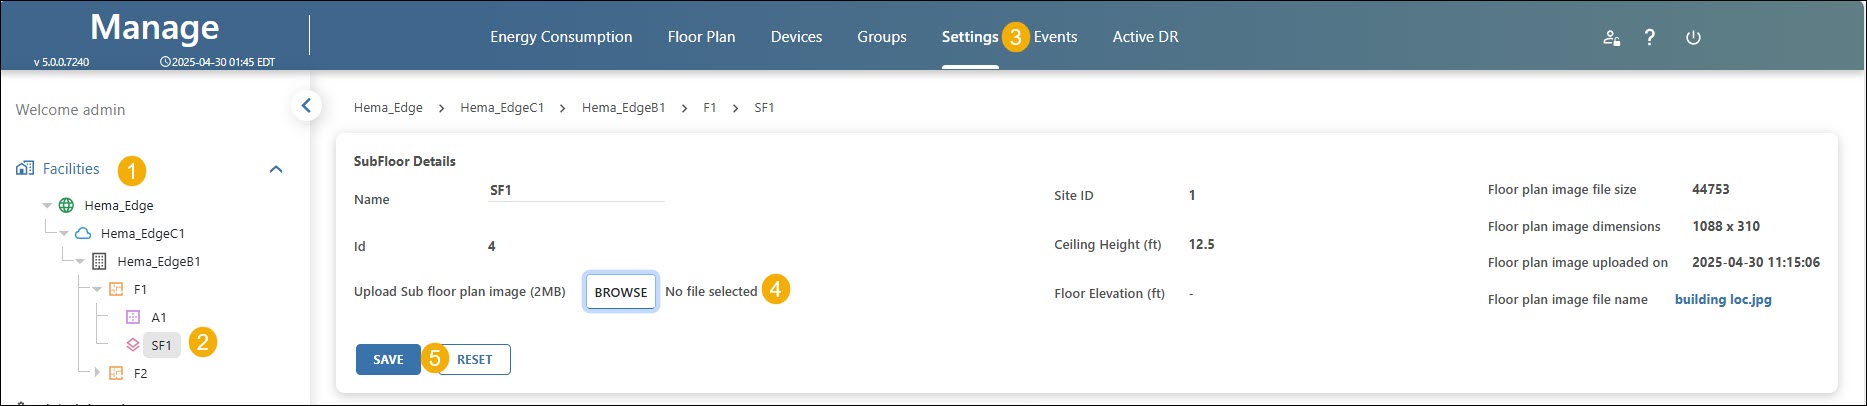
Editing or Deleting an Existing Subfloor
- Select a Facility in the facilities' navigation panel.
- Select the Campus > Building > Floor of the facility.
- Click the Settings tab.
- Scroll down to the lower portion of the screen to the Details section. It contains an edit section and the list of subfloors available on the floor.
- Scroll through the list and click the Edit button of the area to be edited. The attributes are displayed in the Details window.
- Click Edit to modify the details.
- Click Save.
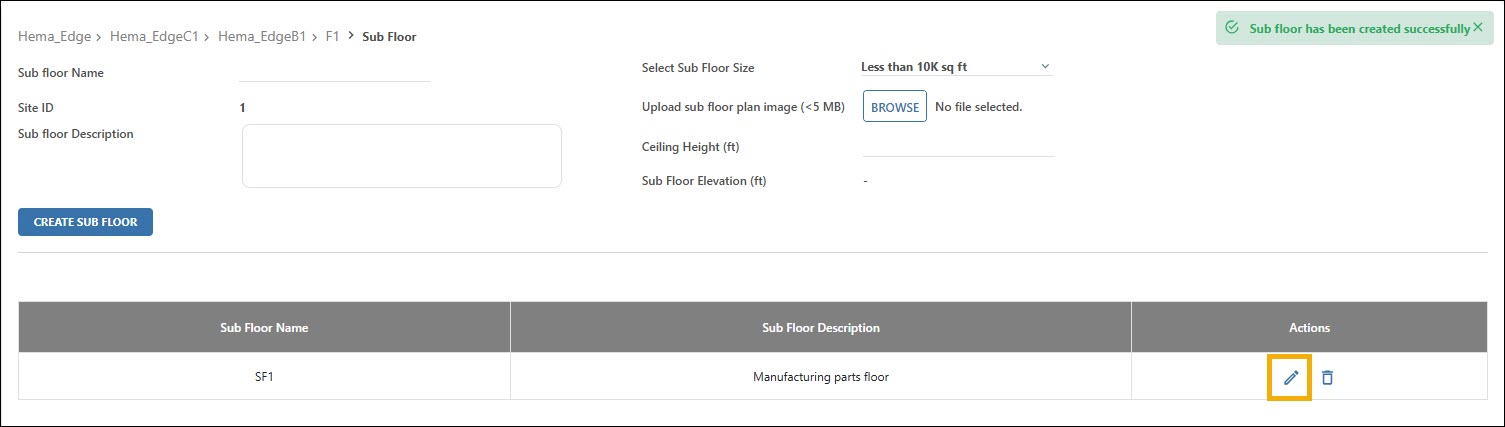
To delete a subfloor, click Delete. In the confirmation popup, click OK to confirm. The subfloor is deleted from the table. Subfloors cannot be deleted unless all sensors have been removed from the subfloor, and no gateways are shown on the subfloor.
Replacing the Graphics Image of the Subfloor Plan
As subfloor plans may change over time, the system or facility admin may add or replace a subfloor plan's graphic image. A smaller size image can lead to fixtures outside the bounds of the image and may not be visible, while a larger image will lead to fixtures changing position on the floor plan. To change the floor plan graphic image of a floor or subfloor, follow these steps:
- Select a Facility in the facilities' navigation panel.
- Click on the Campus > Building > Floor > Subfloor in the facility's navigation panel.
- Click the Settings tab.
- Click the Change Floor Plan button, and choose the graphic image file in the popup window from your system, and click the Upload button to upload the file.
- Click Save.
Recommended articles:

