Enlighted recommends that all systems perform an Operating System (OS) upgrade in order to continue receiving product updates. This article describes the procedure for upgrading the OS for mid-range and standard on-premise Manage systems. Only a user with administrator role is allowed to upgrade the on-prem server software.
Upgrading the operating system for Cloud-hosted (EMC), and Enterprise (EEM) systems require Enlighted Support's involvement.
Please submit a ticket to Enlighted Support for upgrading cloud-hosted systems. Please include your contact information in the ticket so our support specialist can initiate an authorized remote session with you for accessing and upgrading Manage. Any Enlighted Manage solution that cannot be accessed remotely will require onsite support from the field engineering team, and that may incur contractual cost to perform such service.
Warning: It is highly recommended that you back up your data on Manage before starting the upgrade process as a precautionary measure. If for some reason, the upgrade process fails, you can restore Manage with the backup. Refer to Backup and Restore Server Configuration and Data.
Checking your Enlighted Manage Compatibility
Only perform an OS upgrade using version 4.1 or later.
The following device configurations require additional steps when upgrading the operating system of the Manage application. Please contact Enlighted Support if any of the below apply to your system, you have any questions, or require additional help.
- All system upgrades to Enlighted Manage in the Cloud (EMC) systems must be performed by Enlighted Support.
- Customers running the 3.9.12 Ubuntu 18 version, please contact Enlighted Support prior to the upgrade.
- On-premise Manage installed on an MSI box (purchased prior to 2016) may not support the OS upgrade.
Upgrading Manage Software
The steps for upgrading the software are:
- Obtain the image file (a DEB file) and store it on your system (refer to the Manage Software Releases to download the required deb file).
- To upload the image file to the server, click the Administration > EM Management menu item to see the server upgrade screen, which is available only to the user admin. This creates a new tab in your browser, and the following screen is displayed.
- Type the username and password for user admin.

After successfully reauthorizing, Navigate to Administration> Manage Upgrade

Select Choose File and click the Upload button to upload the image file.
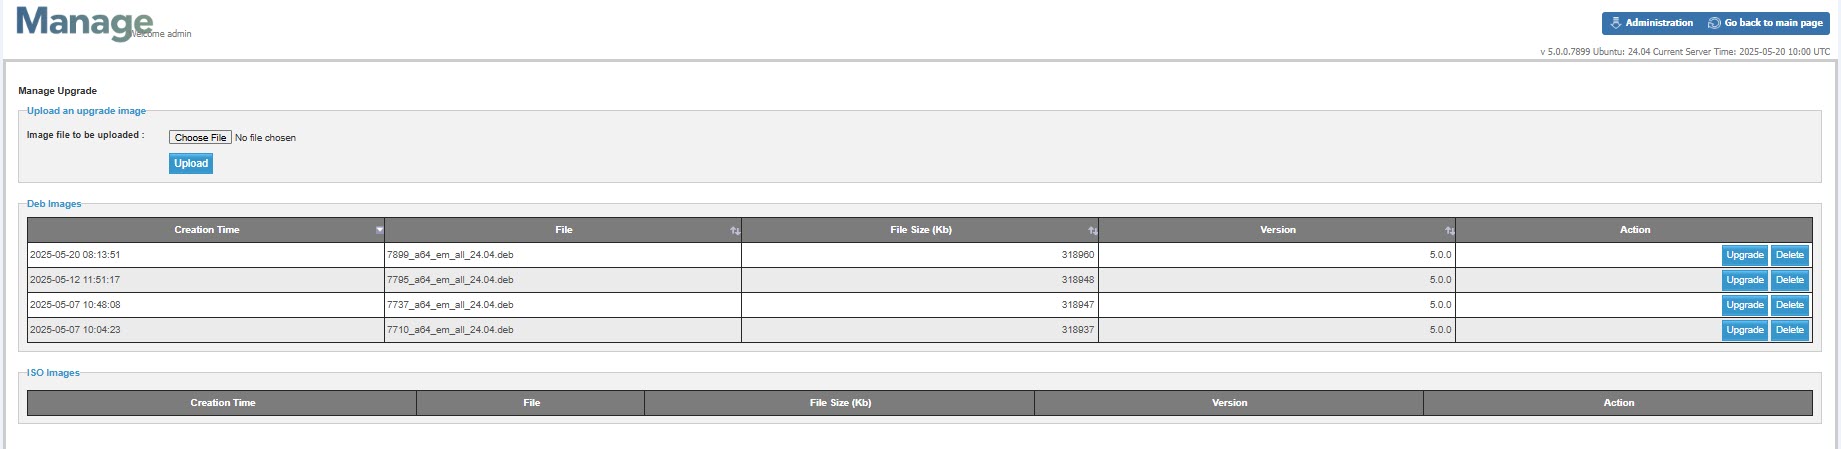
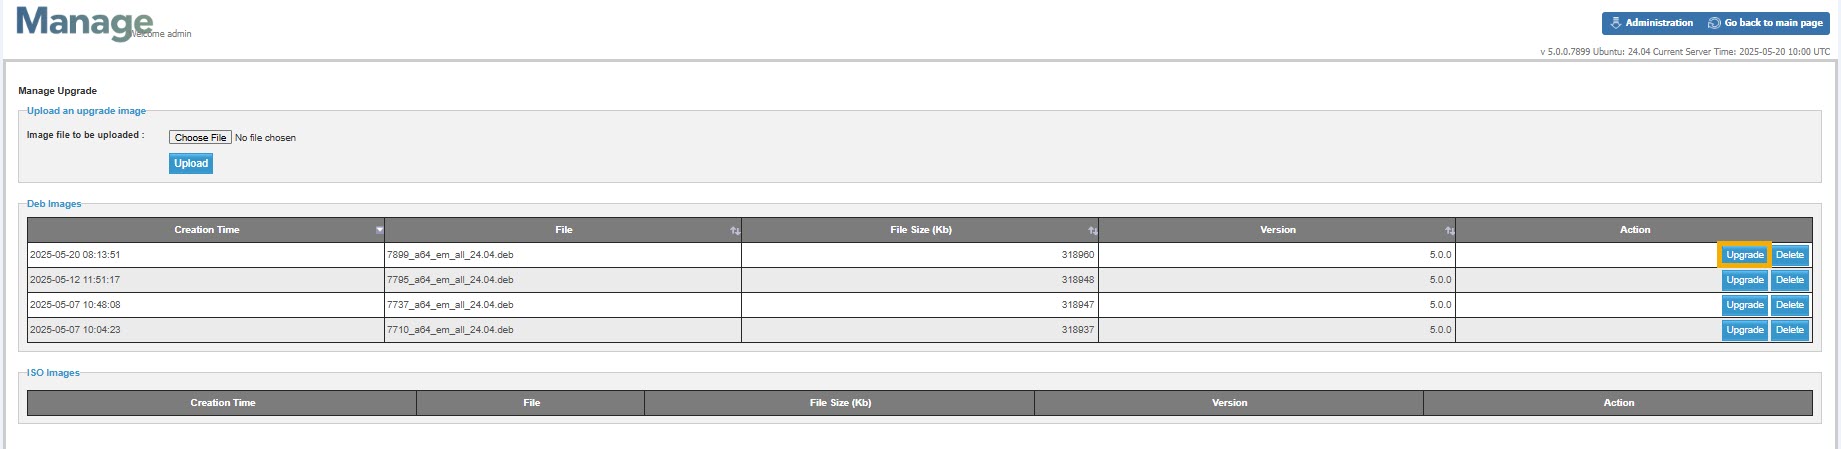
Please wait while the file is uploaded message is displayed. The uploaded image file is added to the list of images. Click the Upgrade button for the uploaded image to start the system upgrade.
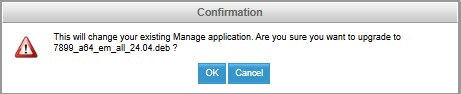
A warning message appears that this action will change your existing Manage application. If you are sure you want to upgrade, click OK.
After it is clicked, a message will be displayed that shows the progress of the upgrade. Here is an example of the screen showing the upgrade process:

On completion, the screen will look like the following:

Clicking here closes the window and displays the Upgrade screen. The version number should match the version of the image file used for the upgrade.
To get back to the main page, close the previous tab for the main page, and click the Go back to the main page button.

The sign-in screen will be displayed. After signing in, you should see a new build number and/or version in the web browser display.
Recommended articles:

